


Hey there! As a supplier of capping machines, I often get asked about how to calibrate these nifty pieces of equipment. Calibration is super important as it ensures that your capping machine works efficiently and accurately, giving you a consistent and high - quality capping result every time. In this blog, I'll walk you through the steps to calibrate a capping machine.
Why Calibration Matters
Before we dive into the calibration process, let's quickly talk about why it's so crucial. A well - calibrated capping machine can prevent issues like loose caps, which can lead to product leakage and spoilage. On the flip side, over - tightened caps can damage the container or make it difficult for consumers to open. Calibration also helps in maintaining the machine's performance over time, reducing downtime and saving you money in the long run.
Pre - Calibration Checks
First things first, you need to do some pre - calibration checks. Make sure the machine is clean and free from any debris or product residue. A dirty machine can affect the calibration and lead to inaccurate capping. Also, check all the mechanical parts for any signs of wear and tear. If you notice any damaged parts, replace them before starting the calibration process.
Inspect the conveyor belt, if your capping machine has one. It should be running smoothly without any jerks or misalignments. The speed of the conveyor is also important as it affects the capping process. You can use a tachometer to measure the conveyor speed and adjust it according to the machine's specifications.
Step 1: Set the Cap Feeder
The cap feeder is responsible for supplying caps to the capping head. Start by adjusting the cap feeder to ensure that it is feeding caps at the correct rate. You can do this by adjusting the vibration intensity of the cap feeder bowl. If the caps are not feeding properly, you may need to check the orientation of the caps in the bowl. Some caps have a specific orientation that needs to be maintained for proper capping.
Make sure the cap chute is clean and free from any blockages. The caps should slide smoothly down the chute towards the capping head. If there are any issues with the cap chute, such as rough edges or misalignments, it can cause caps to jam or not feed correctly.
Step 2: Adjust the Capping Head Height
The height of the capping head is crucial for proper capping. If the capping head is too high, the caps may not be tightened properly. If it's too low, it can damage the container or the cap. To adjust the capping head height, refer to the machine's manual. Most capping machines have a height adjustment mechanism, which can be a hand - wheel or a motorized system.
Place a sample container under the capping head and adjust the height so that the capping head just touches the cap when it is in position. You may need to make a few small adjustments to get the perfect height. Once you have set the height, lock the adjustment mechanism to prevent it from moving during the capping process.
Step 3: Set the Torque
Torque is the amount of force applied to tighten the cap. Setting the correct torque is essential for ensuring that the caps are tightened to the right level. Different types of caps and containers require different torque settings. You can use a torque wrench to measure and adjust the torque of the capping head.
Start by setting the torque to a low value and gradually increase it while testing the capping on sample containers. Check the tightness of the caps on the containers. You can do this by trying to twist the cap by hand. If the cap is too loose, increase the torque. If it's too tight, decrease the torque. Keep adjusting the torque until you get the desired tightness.
Step 4: Check the Capping Alignment
The capping head should be properly aligned with the container. Misaligned capping can result in uneven tightening of the cap or even damage to the container. To check the alignment, place a sample container under the capping head and observe how the cap is being applied.
If the cap is not centered on the container, you may need to adjust the position of the capping head. Most capping machines have horizontal and vertical adjustment mechanisms for the capping head. Use these mechanisms to align the capping head with the container. You can also use a laser alignment tool for more precise alignment.
Step 5: Test the Machine
After making all the adjustments, it's time to test the capping machine. Run a batch of sample containers through the machine and check the quality of the capping. Look for any signs of loose caps, over - tightened caps, or misaligned caps.
If you notice any issues, go back and re - check the calibration settings. Make the necessary adjustments and test the machine again. Keep repeating this process until you are satisfied with the capping quality.
Types of Capping Machines and Their Calibration Specifics
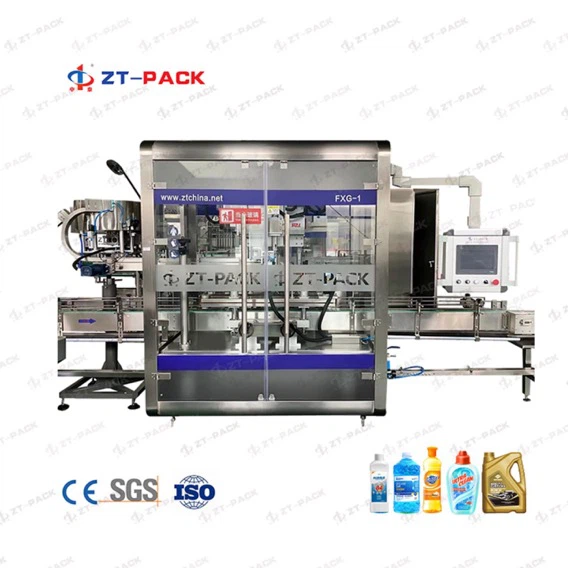
There are different types of capping machines, and each may have some specific calibration requirements. For example, the Linear Tracking Type Capping Closure Machine is designed for high - speed capping. When calibrating this type of machine, you need to pay extra attention to the conveyor speed and the synchronization between the cap feeder and the capping head.
The Automatic Following and Tracking Capping Machine uses advanced technology to follow the movement of the containers. Calibrating this machine involves ensuring that the tracking system is accurate. You may need to adjust the sensors and the control settings to make sure the capping head follows the containers precisely.
The Aluminum Cap Rotary Capping Machine is used for capping aluminum caps. When calibrating this machine, you need to be careful with the torque settings as aluminum caps are more delicate than some other types of caps. Over - tightening can cause the cap to deform.
Conclusion
Calibrating a capping machine is not a one - time task. It should be done regularly to maintain the machine's performance and ensure consistent capping quality. By following the steps outlined in this blog, you can calibrate your capping machine effectively.
If you're in the market for a new capping machine or need more in - depth advice on calibration, don't hesitate to reach out. We're here to help you find the best capping solution for your business. Whether you're a small - scale producer or a large - scale manufacturer, we have the expertise and the right capping machines to meet your needs.

References
- Capping Machine Operation Manuals
- Industry Best Practices for Capping Machine Calibration


